
Do you want to search in all categories or in this category ?

Inventory adjustments can be performed in a number of ways depending on your needs. You can do an inventory adjustment for all products at once, specific product(s), or products in specific location(s). You can choose to either enter the new product quantities directly on the screen or use an excel file to import the updated quantities.
To start an inventory adjustment go to Inventory -> Operations -> Inventory Adjustment and click on the Create button.
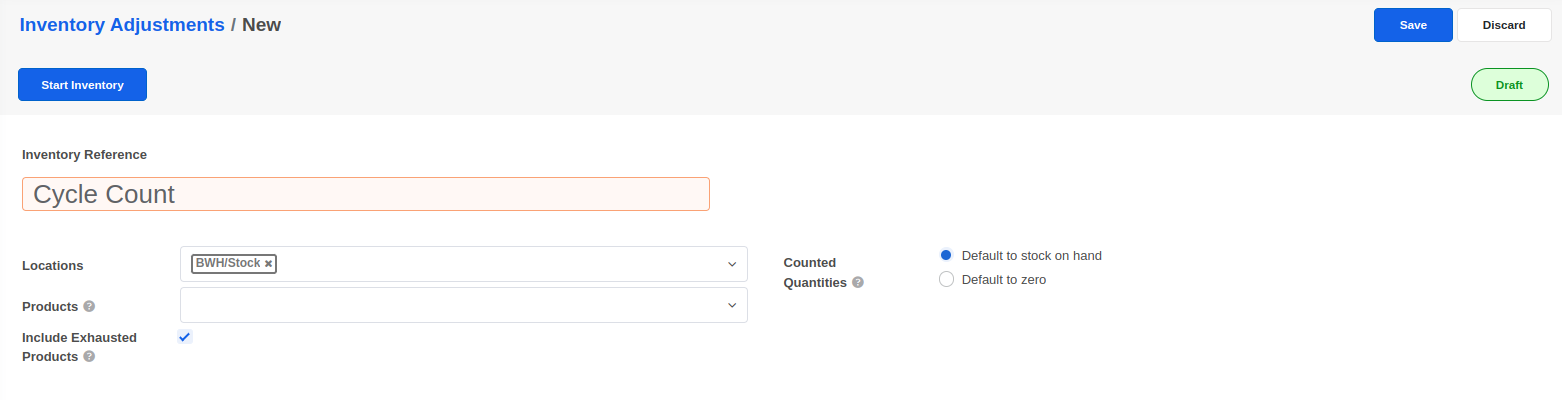
Enter a reference for the adjustment (eg. Annual Cycle Count). If you have multiple stock locations enabled, you can optionally specify the locations you want to cover under the adjustment or leave it blank to consider all locations. Enabling the Include Exhausted Products option will ensure that even products that are currently out of stock are listed in the inventory adjustment. Finally, set the Counted Quantities field to default to stock on hand if you want the adjustment to pre-fill the counted quantities to the current stock level.
Click on the Start Inventory button to load the list of products based on the settings you have selected above.
Set the updated quantities in the Counted quantities column for each product.

Click on the Validate Inventory button after verifying you have input the right quantities for all products.
Follow steps 1 to 3 above,
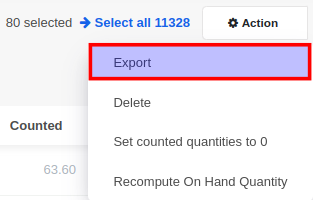
Select all product lines from the list. Only 80 products are shown on a page by default so make sure you also click on the Select all product link at the top.

Click on Action -> Export
In the export wizard, enable the I want to update data checkbox and click on Export.
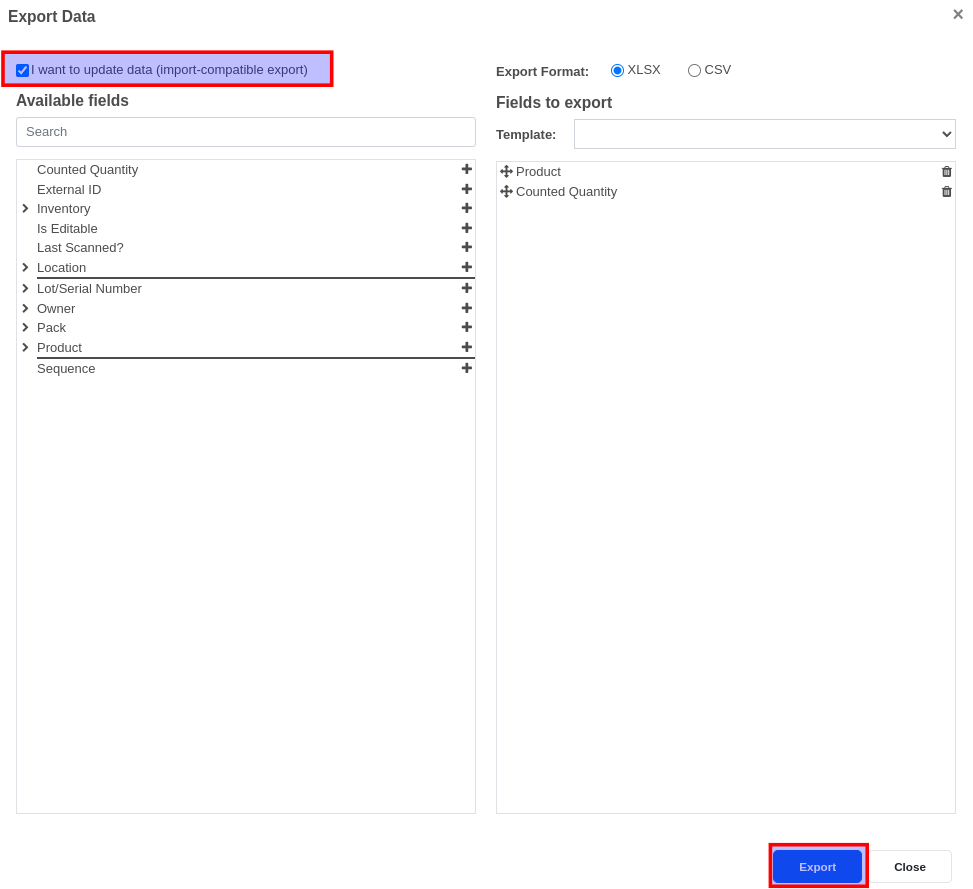
You can now use your spreadsheet editor (Excel, Google Spreadsheets) to update the counted quantity column.
Once you have the updated excel file ready, click on the Import button and load the file.


Click on the Import button to start importing.

Click on the Validate Inventory button after verifying you have input the right quantities for all products.


Advice and answers regarding Inventory